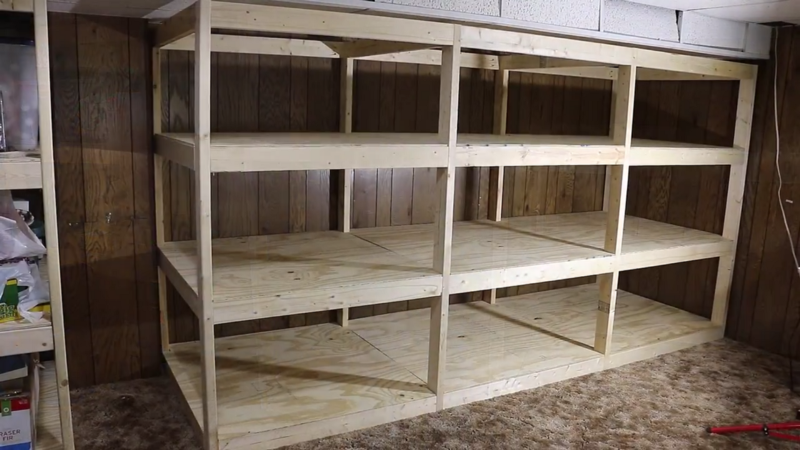
Shelving can give any room in the house an elegant and useful touch. With the right tools and materials, you can build your 2×4 shelving to fit your home. This article will provide a step-by-step guide for how to build your 2×4 shelving, with tips and tricks along the way.
What You Will Need
Before you start building your shelving, you will need certain supplies. Make sure to purchase Douglas fir 2×4 shelving, plywood, and assorted screws. You will also need the right tools to cut and assemble your shelving. These include a circular saw, drill and drill bit, measuring tape, and screwdriver. Finally, you should have sandpaper, paint, brushes, and a leveler.
It is important to ensure you have all the necessary supplies and tools before you begin. You should also ensure that you have a clear workspace and a plan for assembling the shelves. Additionally, you should wear safety goggles and gloves to protect yourself from any potential hazards.
Step-by-Step Guide
This step-by-step guide will help you create elegant shelving that will fit perfectly into your home. Follow these steps carefully to ensure the best results.
· Planning and Measuring
Before building the shelving, you need to plan exactly where it will go. Measure the area where you want the shelf to go, noting the length, width and height. Once you have determined the size of the shelf, plan how many shelves it should have and how tall each shelf should be. This will be determined by the items you want to store on the shelf.
· Cutting the Wood
Now that you have chosen the size of the shelf, it’s time to start cutting the wood. Make sure to measure and double-check your cuts before you start cutting. Once you have all your pieces cut, it’s time to assemble. Make sure all the pieces fit together before you start drilling and screwing.
· Building the Frame
Start by laying out each piece and assembling the frame of the shelves. Make sure to match up all the corners, so your frame is square. Once everything is in place, drill pilot holes into each corner and attach wood screws. Also, make sure that only the sides of the frame are attached – do not attach the top or bottom.
· Adding Shelves and Braces
Next, attach shelves at even intervals between each brace by drilling pilot holes through each shelf and then using screws to attach them securely. Make sure these are level as you go. Once each shelf is in place, attach braces to the sides of the shelves for added support and rigidity.
· Finishing Touches
To finish your shelving, sand down any rough edges and apply a layer of paint or sealant over the whole frame. If you choose not to paint it, you can always stain it for a more rustic look. Once finished, allow it to dry before adding heavier items. Be sure to use wall anchors in studs if your shelves will be used to hold heavier items.
· Adding Decorative Touches
Once your shelf is complete, you can add some decorative touches to make it look even more stylish. Consider adding decorative trim around the edges or decorative knobs or handles to the shelves. Adding some wall art or plants to the shelves gives it a more personal touch.
Tips for Successful 2×4 Shelving Projects
Measure twice, cut once: Before you start cutting any pieces, make sure to measure twice to avoid any mistakes.
- Use Wall Anchors: If your shelving is used for heavier items, use wall anchors in studs for extra support.
- Sand And Paint: Sand down rough edges and add a layer of paint or sealant for a finished look.
- Securely Attach: Make sure to securely attach each shelf and brace it with wood screws.
When installing shelves, it’s important to use the right tools. Use a level to ensure that the shelves are even and straight. Additionally, use a drill to pre-drill holes for the screws to ensure the wood does not split.
Troubleshooting Common Problems
Sometimes mistakes happen, and shelf projects don’t always turn out as planned. Here are some tips on troubleshooting common problems when building a shelf.
- Joints Not Lining Up: If your joints aren’t quite lining up right, try taking out any screws that are preventing them from fitting properly.
- Unlevel Shelves: Before attaching shelves, ensure they are completely level. You can use a leveler for this.
- Loose Screws: If any of your screws seem loose, use longer screws and drill deeper pilot holes.
Conclusion
When it involves organizing and taking care of things, shelves are very important. Don’t leave your garages sloppy and your valuable tools lying around all over the place. Make these awesome and simple garage shelves to make your parking garages look bigger and more organized.


