
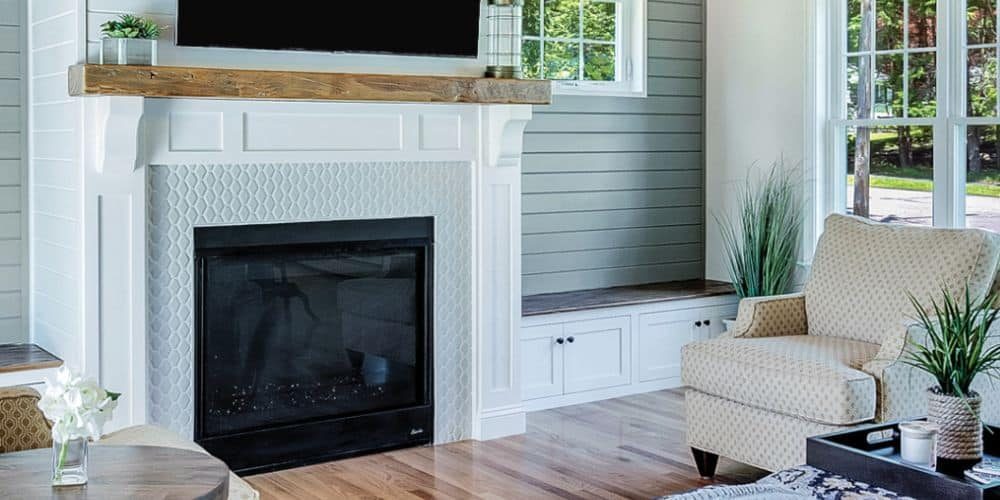
Creating a stunning shiplap fireplace effectively adds a stylish and rustic look to your home. Shiplap is a popular home trend that adds texture, drama, and warmth to your living space, and it’s a great way to update your fireplace without breaking the bank. With just a few materials and patience, you can create an eye-catching ship-lapping fireplace that will envy all your guests.
What Materials You’ll Need
The materials you’ll need to create a shiplap fireplace depend on the size of the fireside. Still, typically you’ll need ship-lapping sheets, masonry screws and washers, construction adhesive, a miter saw, a drill, and a hammer. Use a joint compound or caulk to fill in any gaps or cracks in the walls surrounding the fireplace. Make sure the shiplap you choose is the right size and type (nails, screws, adhesive) for your fireside.
In addition, use a level to ensure the ship-lapping boards are installed correctly. You may also need to purchase additional tools, such as a jigsaw or a circular saw if you are cutting the boards to fit the size of your fireside. Finally, the sealant protects the shiplap boards from moisture and other elements.
Preparing the Area for Shiplap Installation
Before installing a ship-lapping on your fireplace, it’s important to ensure the area is properly prepared. Start by sweeping and vacuuming the floor around the fireside to avoid any loose debris from sticking to the back of the shiplap sheets. Then, use a mild cleaner and damp cloth to clean the walls around the area. To ensure the ship-lapping sheets fit properly and securely, measure the width of the wall from one corner to the other, including any irregularities in the brick or tile.
Once the area is prepped, you can install the shiplap boards. Start by cutting the sheets to the desired length and then use a level to ensure that the boards are straight. Secure the sheets to the wall with nails or screws, leaving a small gap between each board for expansion. Finally, caulk the edges of the boards to ensure a tight seal.
Installing the Shiplap onto the Fireplace
Once the area is clean and prepped, you can install the ship-lapping sheets along the walls surrounding your fireside. Use a miter saw to cut the sheets to size and ensure they fit snugly against the wall. Then, secure them to the wall using either construction adhesive or masonry screws and washers. It’s important to ensure that each board is level and secure before moving on to the next one so that your finished product looks even and uniform.
When installing the boards, it is important to leave a small gap between each board to allow for expansion and contraction due to temperature changes. This gap should be filled with a flexible caulk or sealant to ensure a watertight seal. Additionally, consider adding a sealant to the sheets before installation to protect them from moisture and other elements.
Finishing Touches to Create a Stunning Look
Once all boards are installed, you can add finishing touches for a stunning look. Add joint compound or caulk around any gaps or cracks in the wall for a seamless finish and any trims or moldings you may want. If desired, you can also paint or stain the ship-lapping boards for an extra pop of color. Most people prefer these instead of implementing wainscoting ideas.
You can add decorative hardware, such as knobs or handles, to the sheets to complete the look. This will give the wall a unique and stylish look. You can also add wall art or other decorations to the wall to give it a personalized touch.
Common Mistakes to Avoid When Installing Shiplap Fireplace
Installing shiplap in your living room can seem intimidating, but it doesn’t have to be. To avoid any costly errors, make sure that you measure twice and cut once, and be sure to use construction adhesive or masonry screws as a secure means of attaching the boards. Another important mistake to avoid is placing nails too close together or using screws that are too long. Doing so could cause problems when you remove the sheets whenever you’d like.
Additionally, it is important to ensure the boards are level and even when installed. If the sheets are leveled, it can prevent the ship-lapping from looking uneven and sloppy. To ensure the boards are level, use a leveler or straight edge to check them before you attach them. Finally, sealant or paint protects the sheets from moisture and other elements.
Troubleshooting Tips for Installing Shiplap Fireplace
If you encounter any issues while installing ship-lapping onto your fireside walls, you can use a few troubleshooting tips to get back on track. Whenever you have difficulty attaching the boards securely, use nails or screws that are the right size for the type of wall and material you’re working with. If the boards need to be level or uniform, try installing them in one direction at a time instead of in batches. Be bold and start over from scratch if things seem off track.
Additionally, ensure you’re using the right type of adhesive for the material you’re working with. If you’re using wood, use wood glue; if you’re using metal, use a metal adhesive. If you’re having trouble fitting the boards together properly, use a chisel to shave off any excess material. Finally, ensure you take the necessary safety precautions while working with power tools and other materials.
Creative Ways to Style a Shiplap Fireplace
Now that your shiplap fireside is installed, it’s time to think about how you want to style it. Try adding a sleek metal mantel and some candle holders to give your living space an elevated feel. Or, if you’d like something homier, accent it with blankets and throw pillows in complementary colors. ship-lapping fireplaces are versatile, so you can experiment with different colors, textures, and accessories until your creation is exactly what you envisioned.
You can also add a few pieces of wall art to the surrounding area to give the fireside a more finished look. Try adding a few geometric shapes or abstract pieces if you want a more modern style. You can hang a few landscape paintings or framed photographs for a more traditional look. Whatever you choose, make sure it complements the room’s overall design.